


← Back to all guides
Unit Armchair — Assembly guide
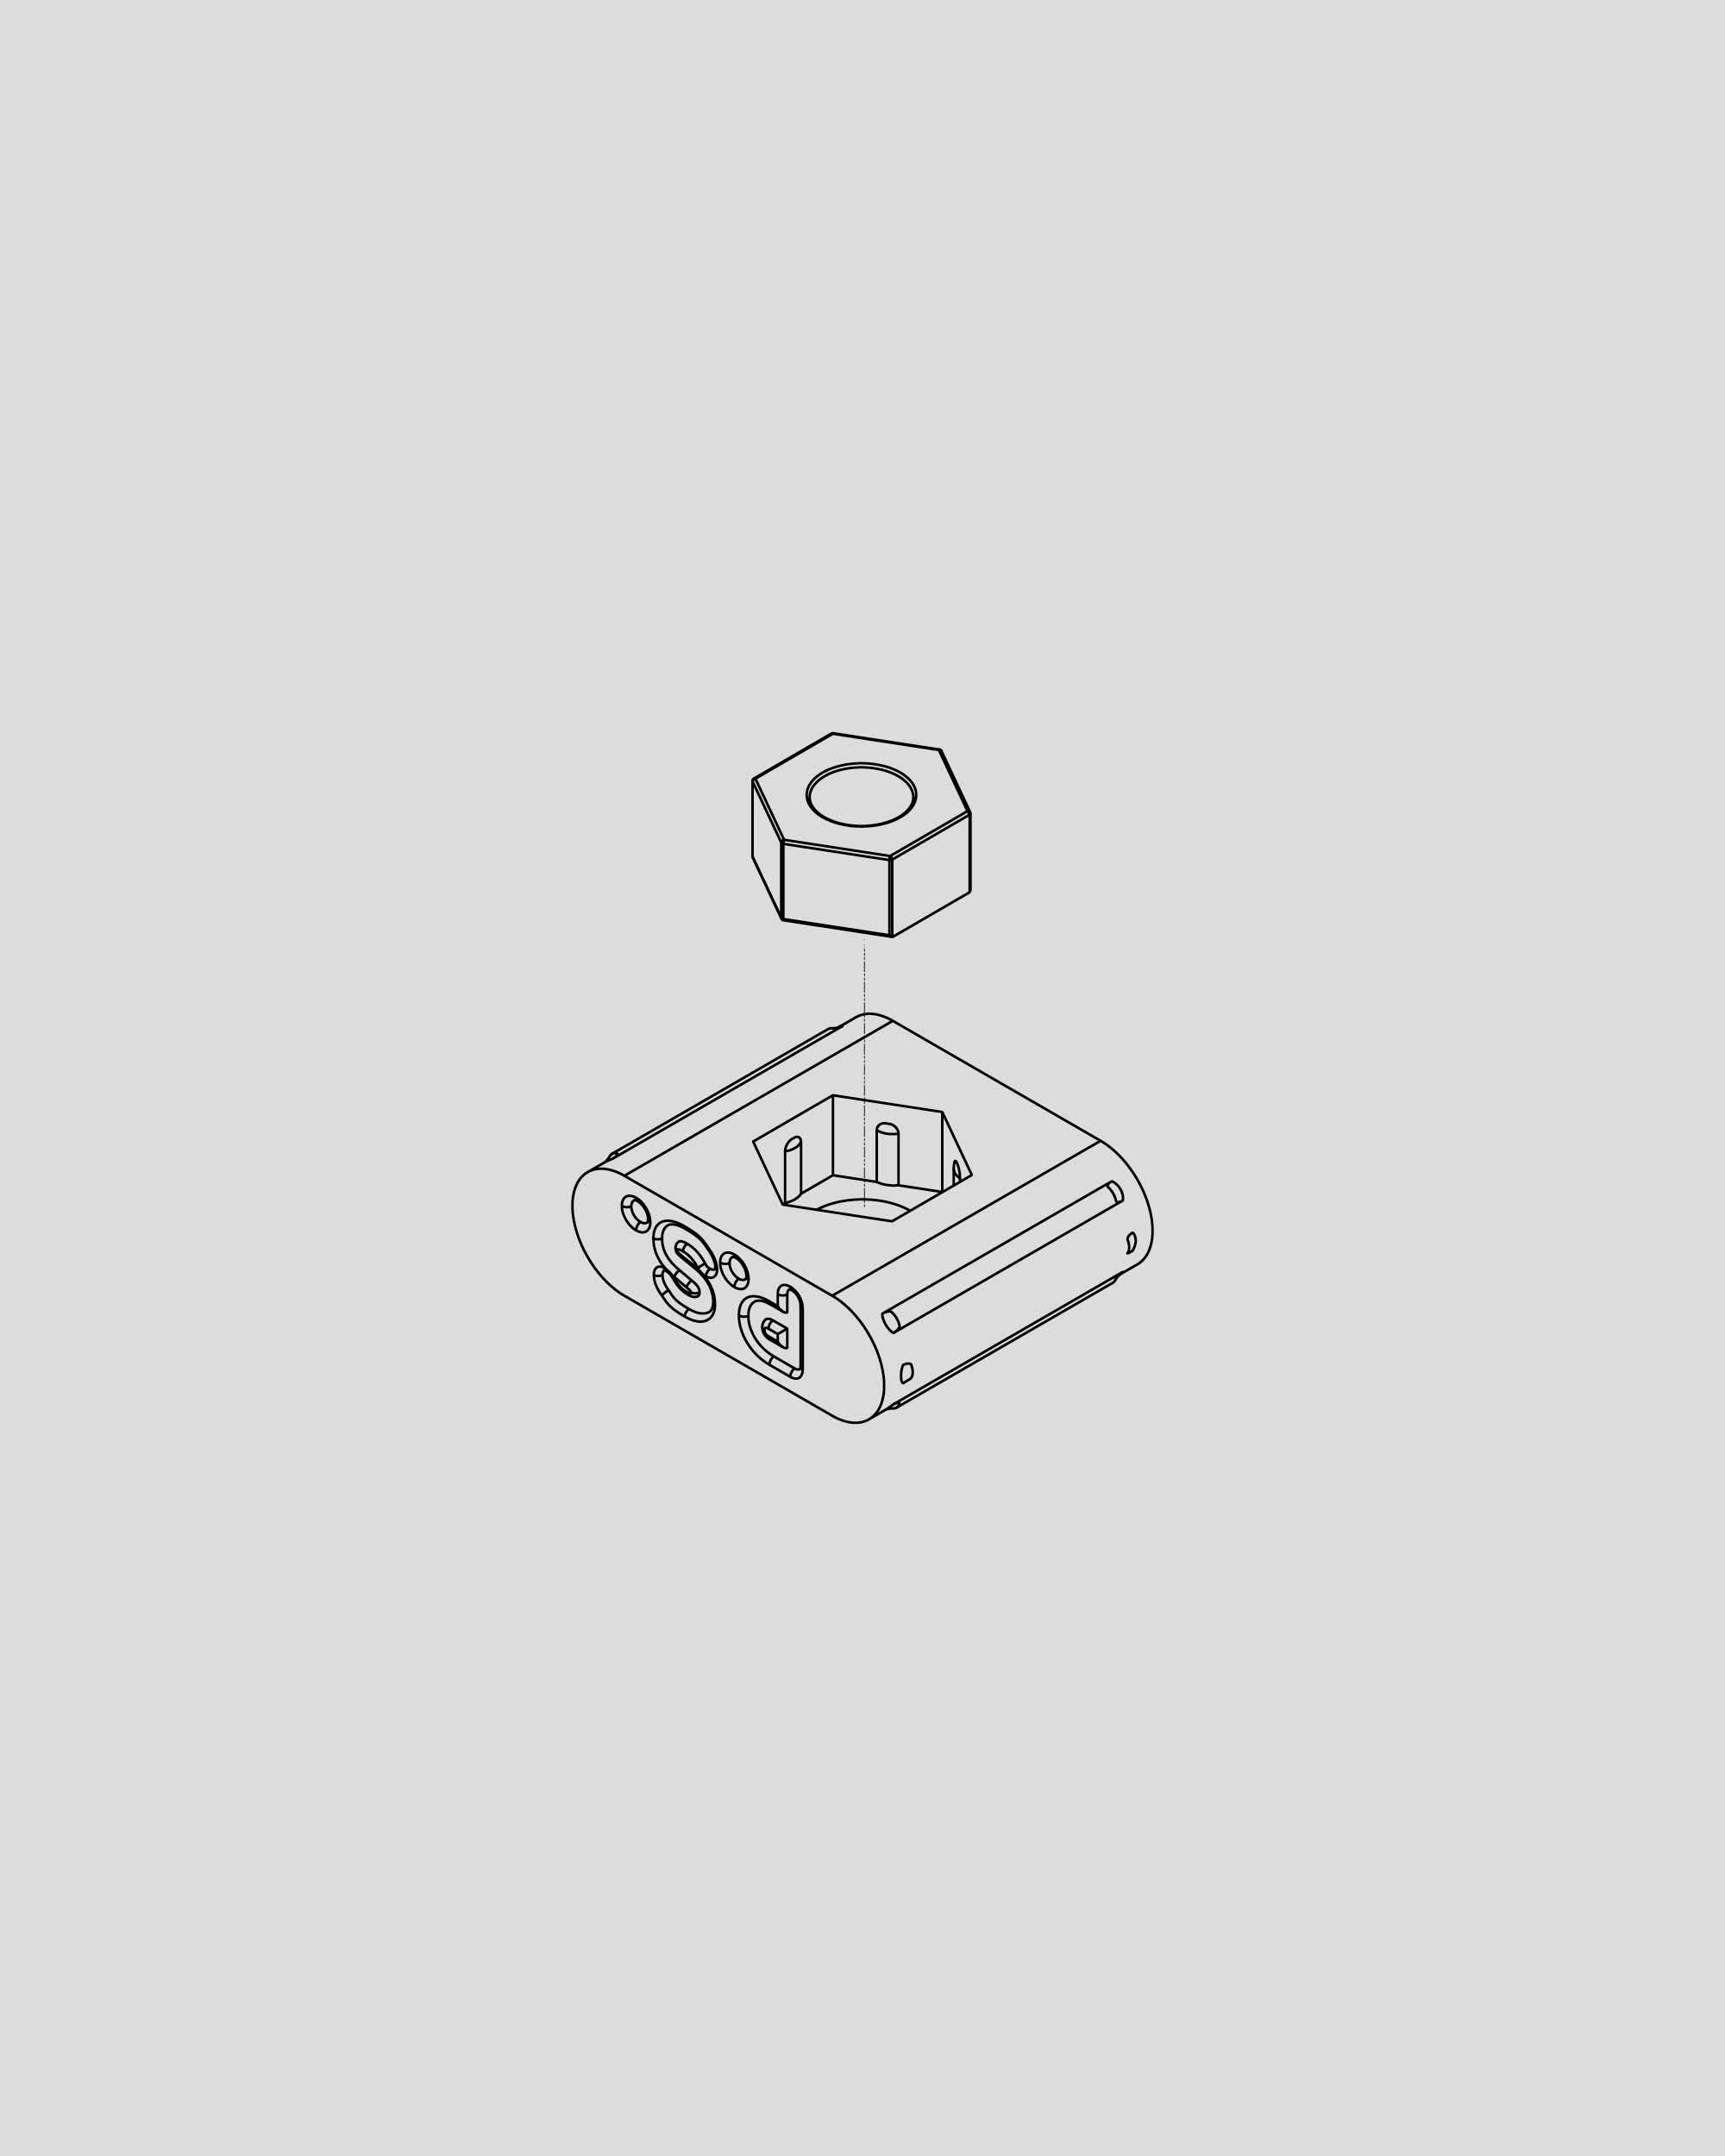
Step 1
Insert the nut into the plastic housing. Press firmly to ensure it sits fully inside. Repeat for all.

Unit Armchair — Assembly guide
Step 1
Insert the nut into the plastic housing. Press firmly to ensure it sits fully inside. Repeat for all.

Step 2
Insert the plastic housing with the nut inside, into the pill-shaped slot. Ensure it’s oriented as shown and no part is protruding. Repeat for all.

Step 3
Lay the back panel flat on a clean, soft surface with the pockets facing up. Align the tabs of the two L-frames with the matching pockets in the panel.

Step 4
Turn the assembly upright to secure the L-frames from the back of the panel using 4 screws.

Step 5
Align the tabs of the L-frames to the pockets of the H-frame.

Step 6
Align the pockets of the front leg panels with the tabs on the H-frame. Push them together and secure each leg using 3 screws (6 screws total).

Step 7
Lower the seat panel onto the frame, ensuring its pockets aligns with the tabs, take your time. Secure the seat from above using 4 screws.

Step 8
Position the curved backrest over the top tabs of the leg frames. Press down firmly to lock it in place, then secure it from above using 3 screws.

Step 9
Your Unit Armchair is now fully assembled. Double-check all screws and tighten them firmly before use.