Dot Stool — Assembly guide

Step 1
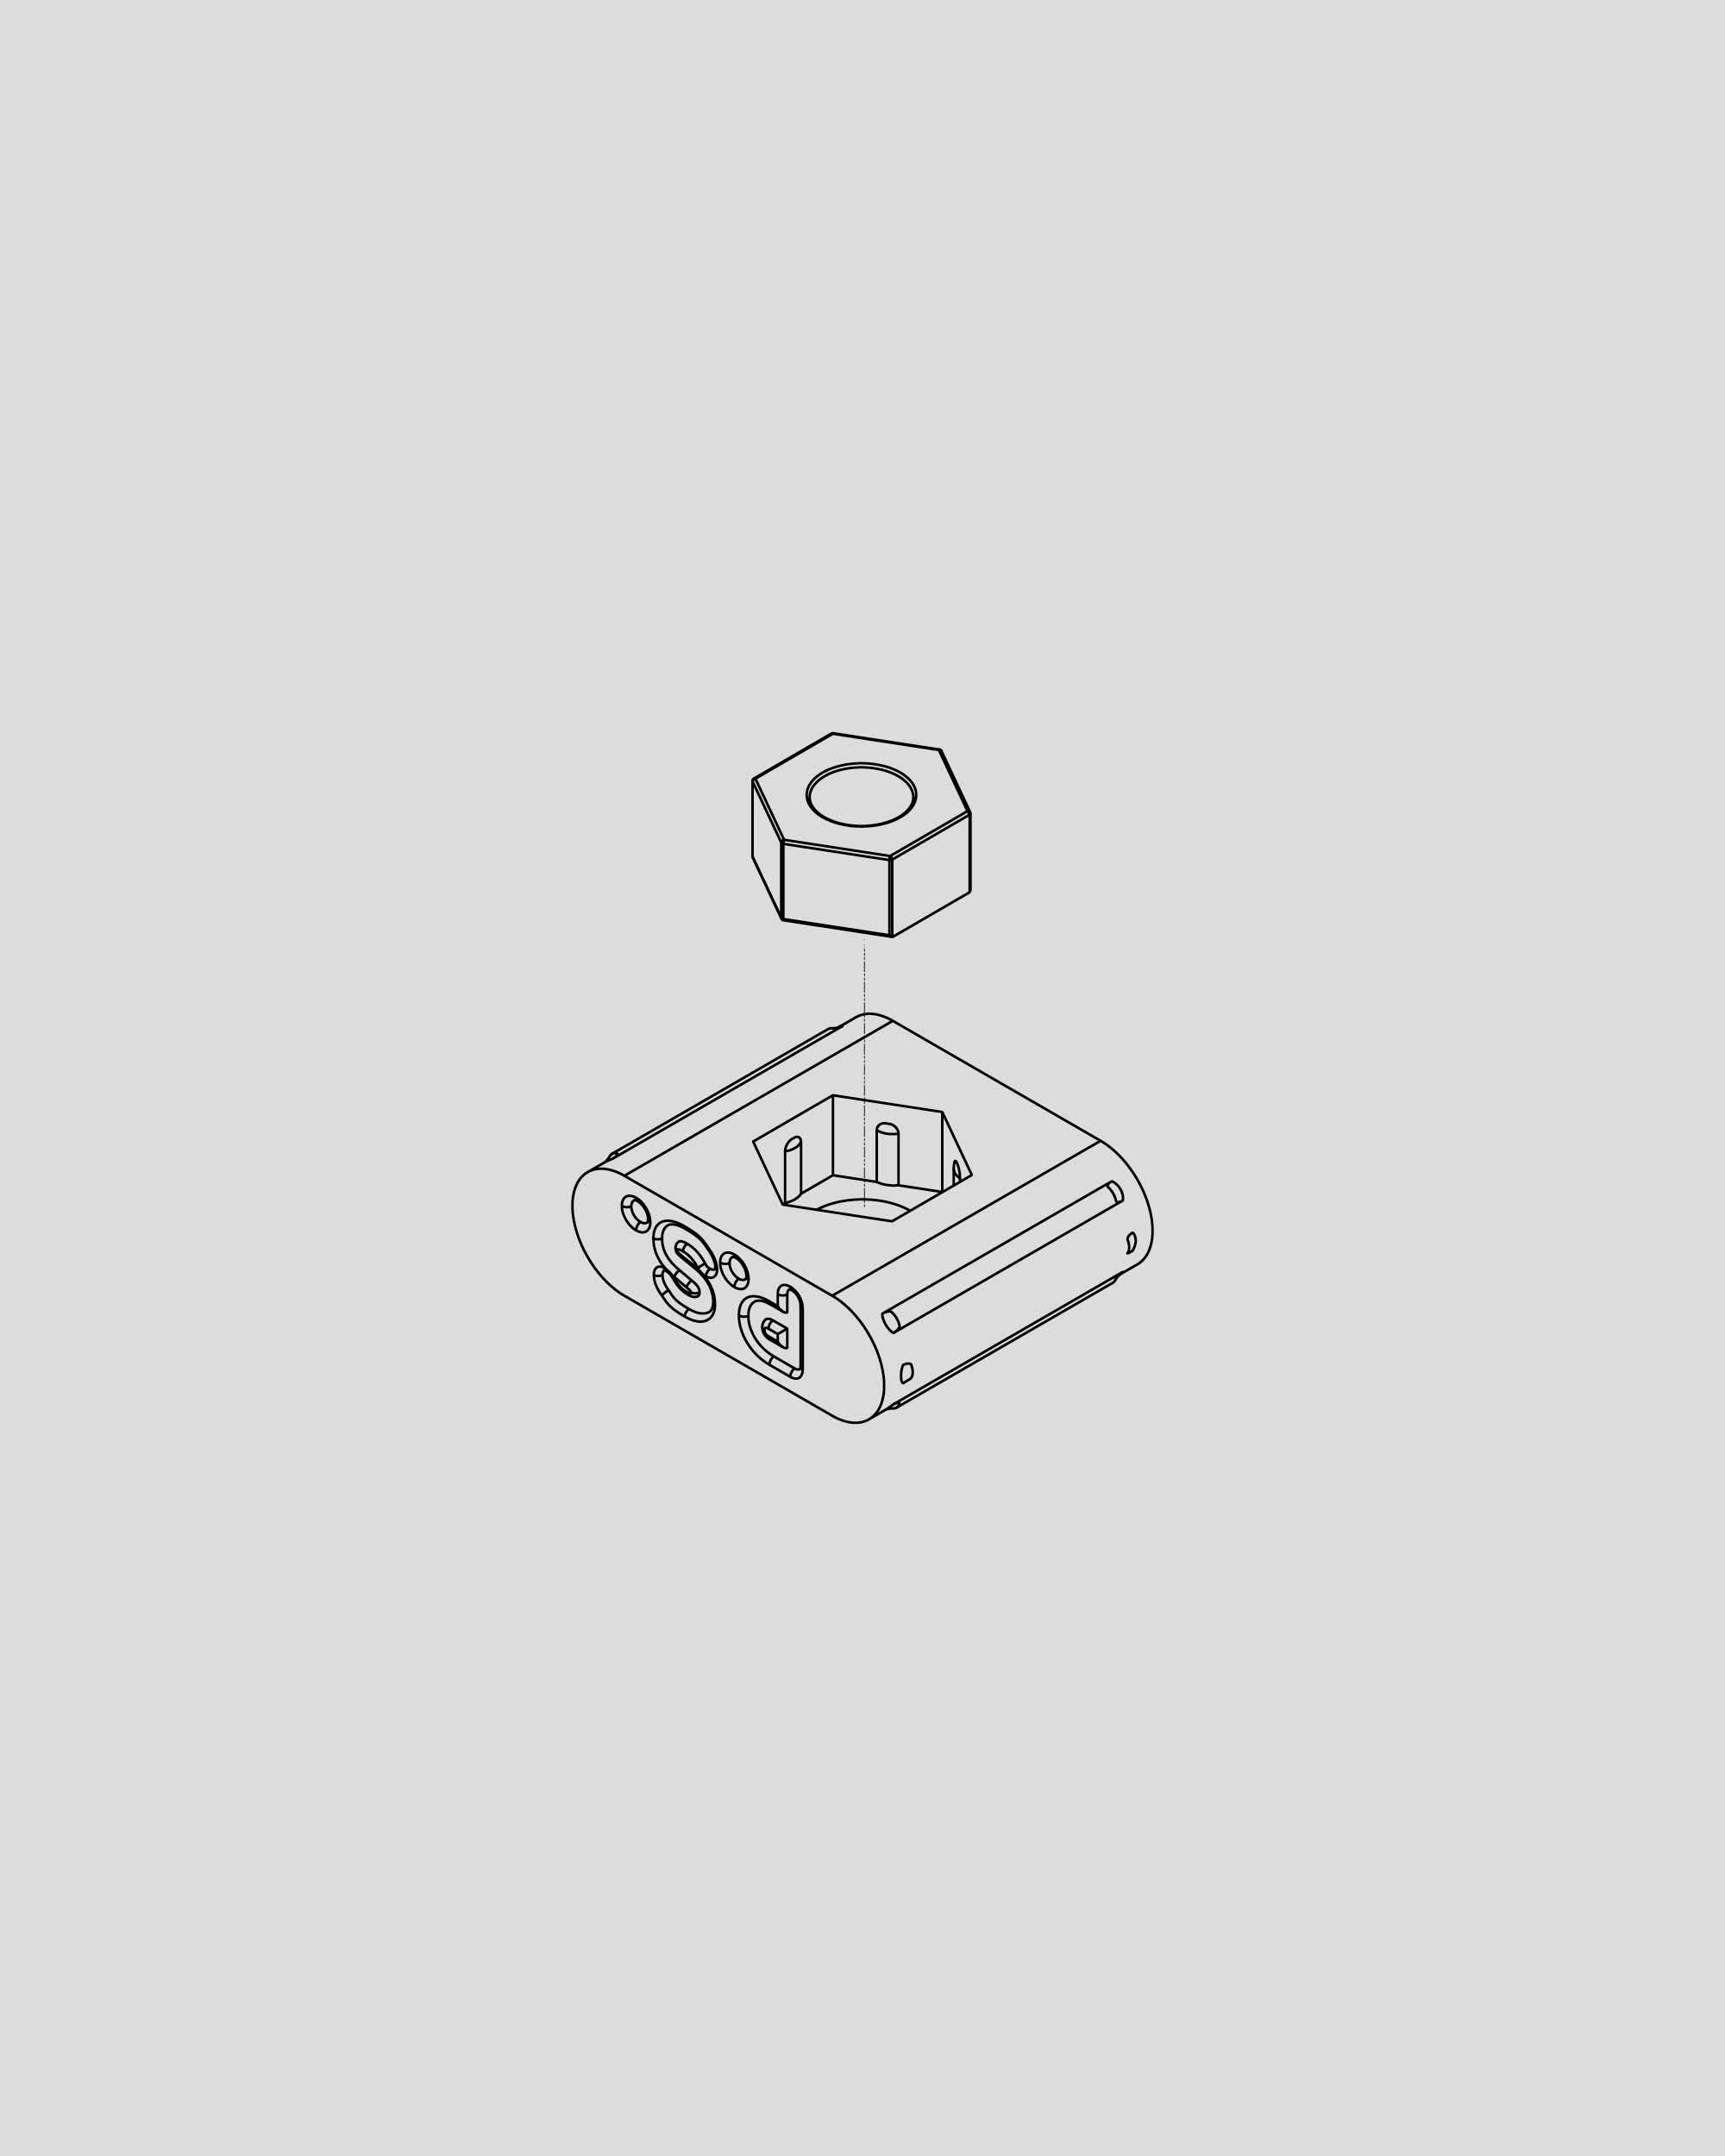
Insert the nut into the plastic housing. Press firmly to ensure it sits fully inside. Repeat for all.

Dot Stool — Assembly guide

Step 1
Insert the nut into the plastic housing. Press firmly to ensure it sits fully inside. Repeat for all.

Step 2
Insert the plastic housing with the nut inside, into the pill-shaped slot. Ensure it’s oriented as shown and no part is protruding. Repeat for all.

Step 3
Lay the top on a flat and soft surface with the pockets facing upward.

Step 4
Fit the first leg into the pockets without the drill holes going through the top.

Step 6
Fit the next leg into its corresponding pockets.

Step 6
Make sure all pieces sits tight and flush with minimal to no gaps. Flip the pedestal over so it stands on the floor.

Step 7
Drive in the screws using a non-electric flat-head screwdriver. Stop when the head is flush with the surface; avoid over-tightening.

Step 8
Finished