


← Back to all guides
Slab Side Table — Assembly guide
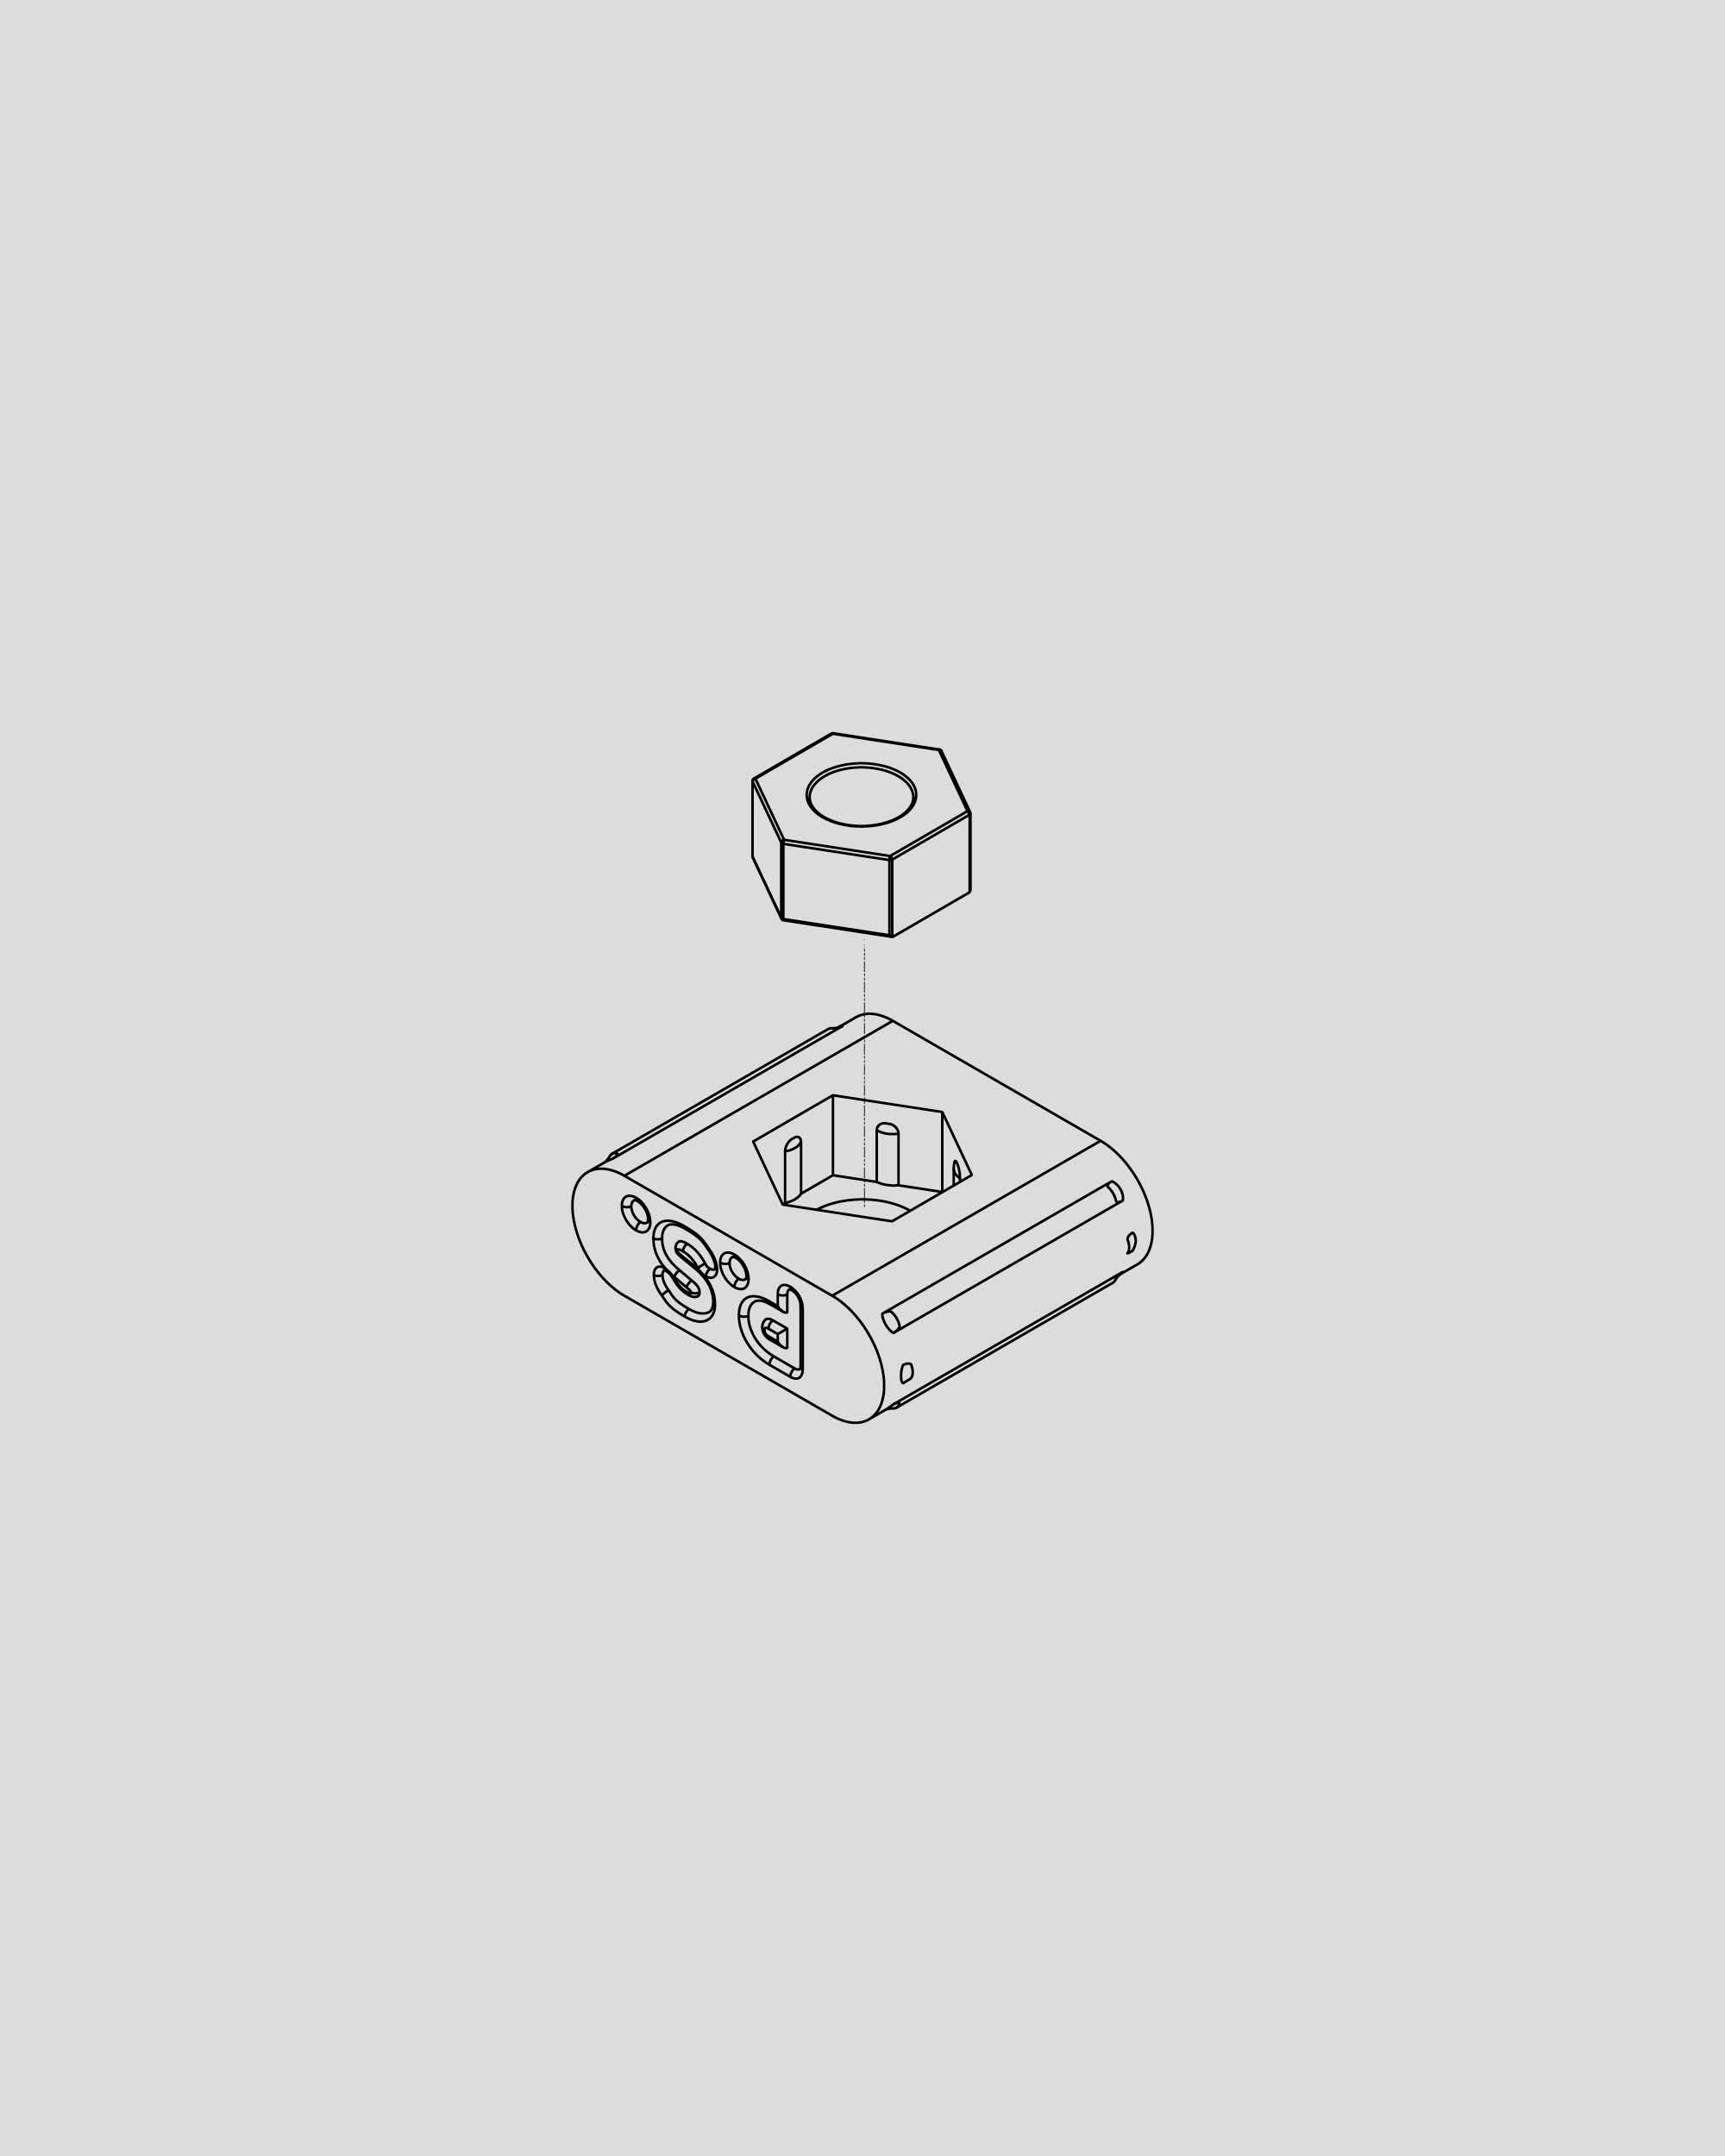
Step 1
Insert the nut into the plastic housing. Press firmly to ensure it sits fully inside. Repeat for all.
Slab Side Table — Assembly guide
Step 1
Insert the nut into the plastic housing. Press firmly to ensure it sits fully inside. Repeat for all.

Step 2
Insert the plastic housing with the nut inside, into the pill-shaped slot. Ensure it’s oriented as shown and no part is protruding. Repeat for all.

Step 3
Place the seat on a flat and soft surface with the pocket facing upward.

Step 4
Fit the cross-beam into the pocket of the seat. Set aside.

Step 5
Lay one of the side pieces on a flat and soft surface with the pockets facing upward.

Step 6
Fit the top shelf, bottom shelf and cross-beam into their corresponding pockets.

Step 7
Fit the remaining side piece onto the shelves and cross-beam. Take your time to fit all pieces into their corresponding pockets.

Step 8
Using a non-electric flat-head screwdriver, drive in the two screws to secure the side piece. Stop when the head sits flush with the surface; avoid over-tightening. Carefully flip the side table over, ensuring the pieces remain securely in their pockets.

Step 9
Drive in the remaining to screws using a non-electric flat-head screwdriver. Stop when the head is flush with the surface; avoid over-tightening. Flip the side table over so it stands upright.

Step 10
Finished