


← Back to all guides
Frame Shelf Module — Assembly guide
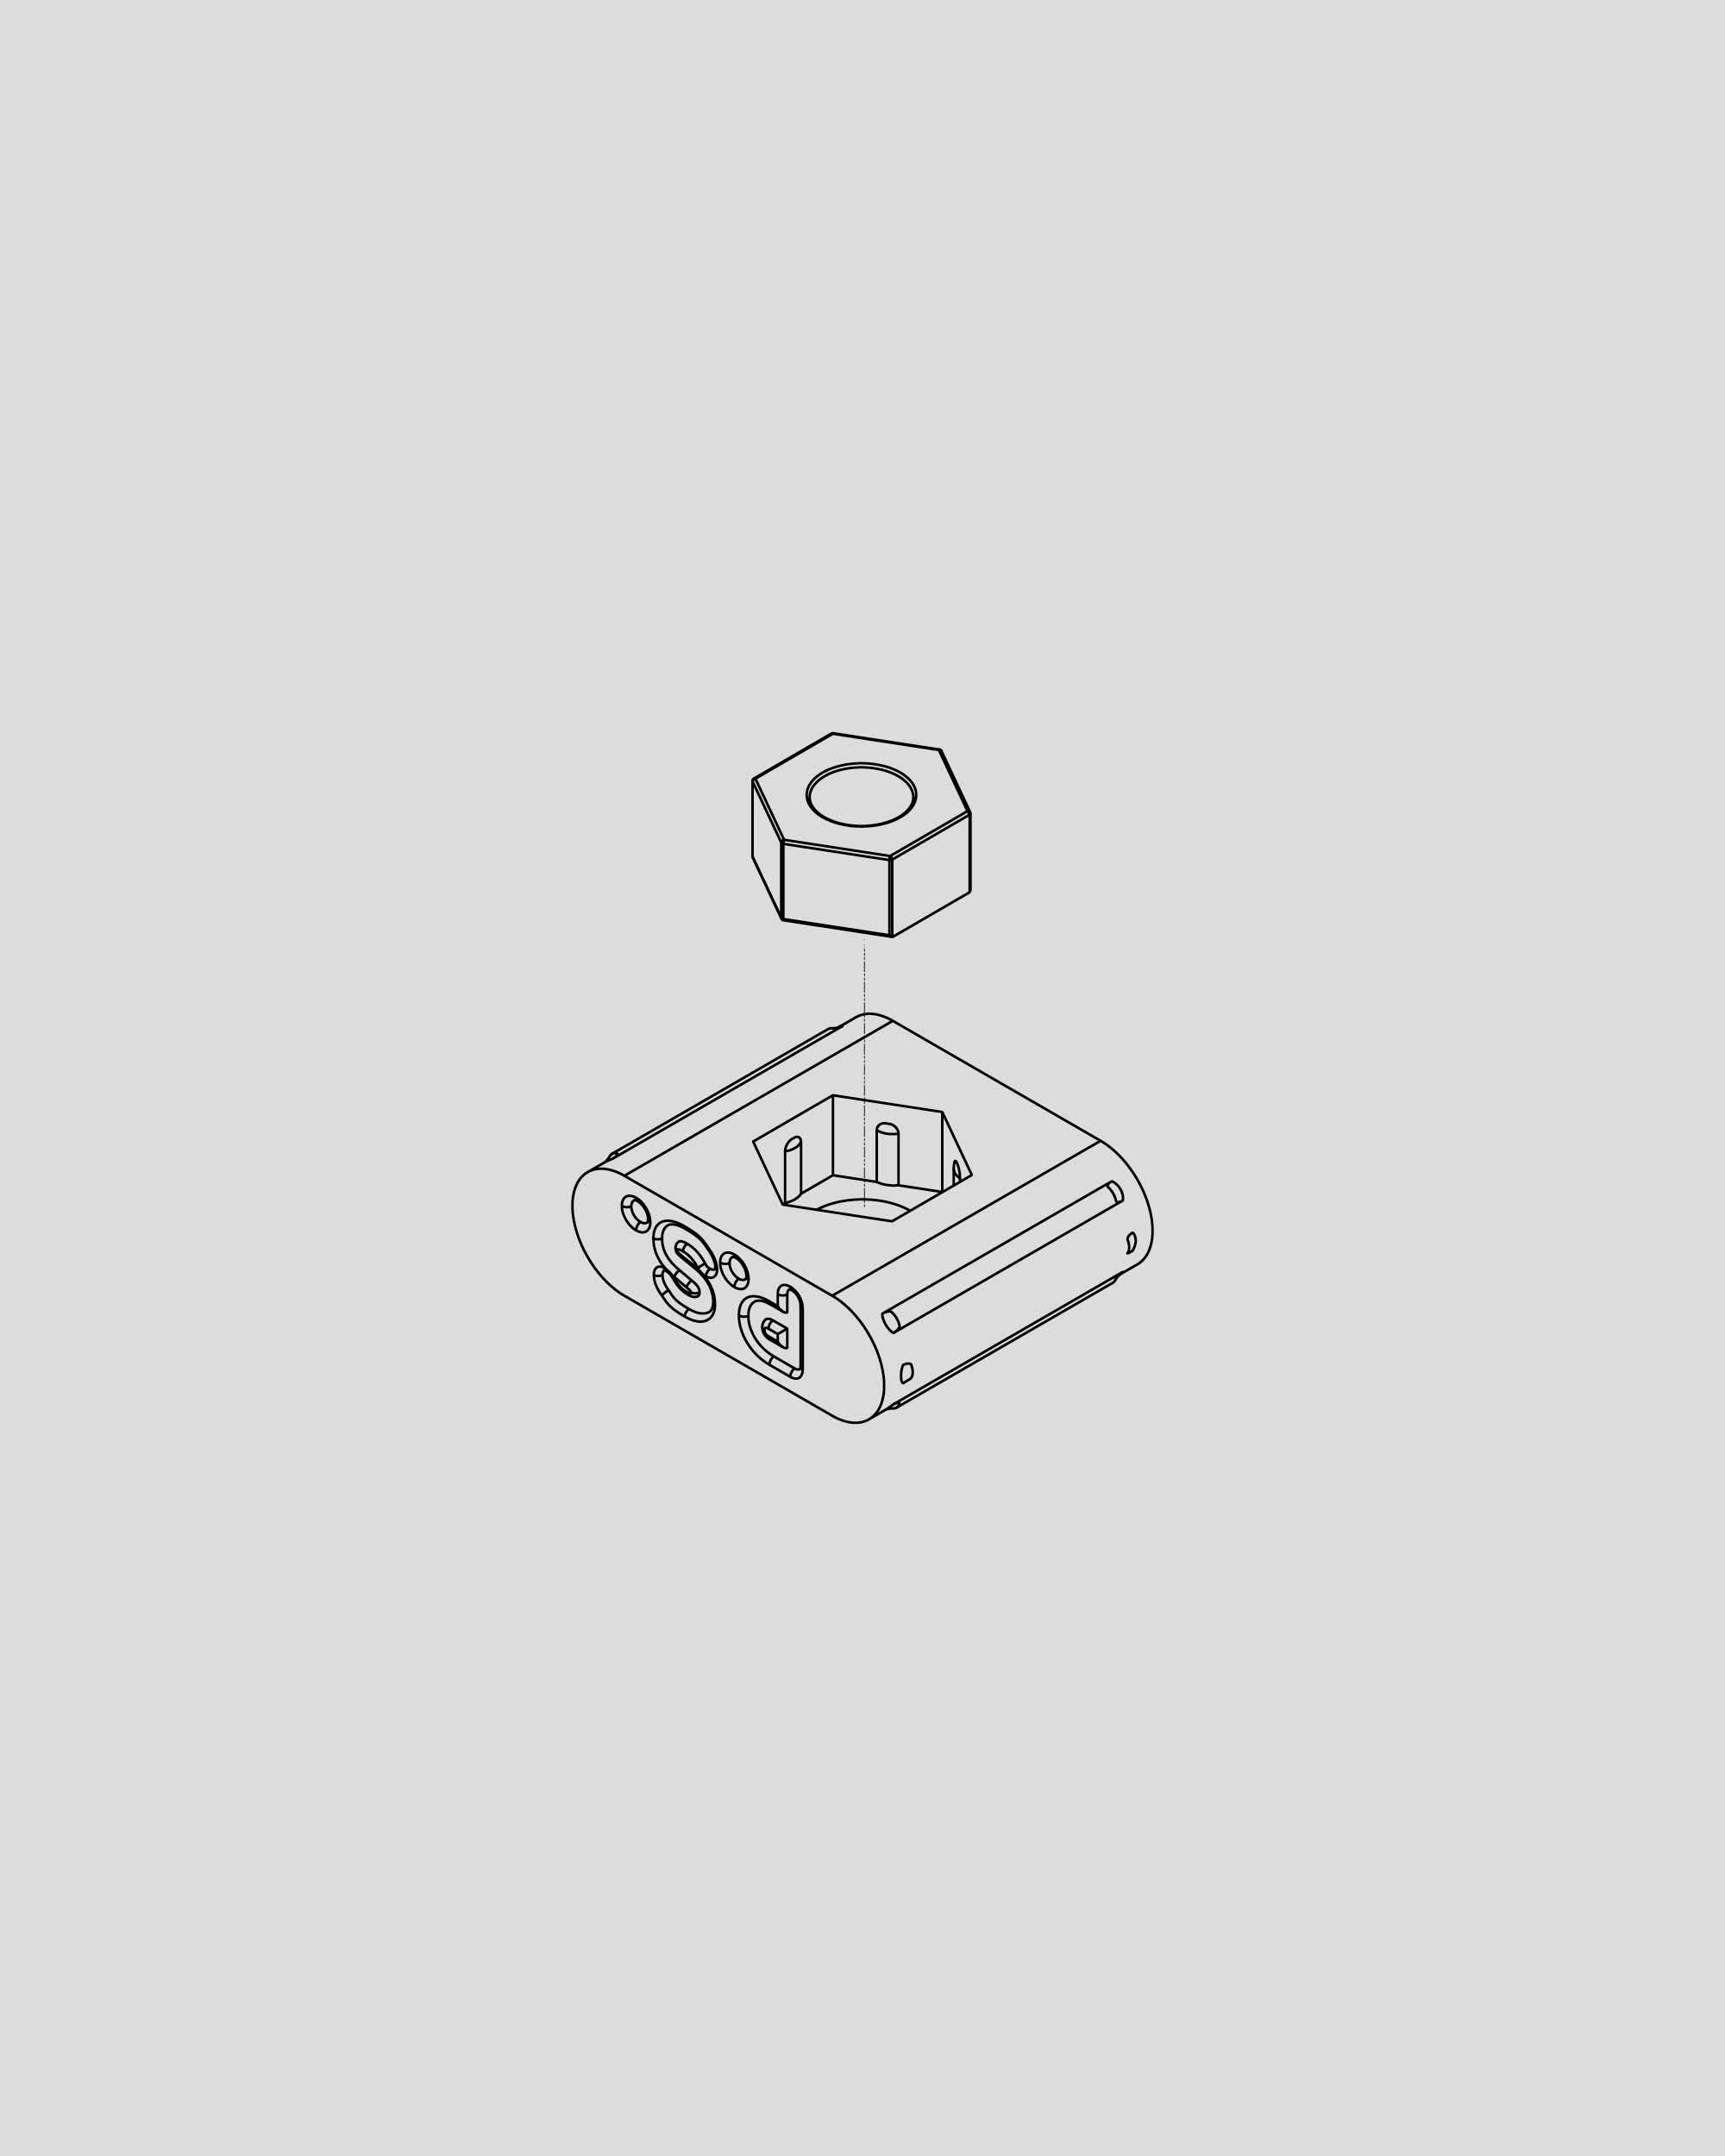
Step 1
Insert the nut into the plastic housing. Press firmly to ensure it sits fully inside. Repeat for all.

Frame Shelf Module — Assembly guide
Step 1
Insert the nut into the plastic housing. Press firmly to ensure it sits fully inside. Repeat for all.

Step 2
Insert the plastic housing with the nut inside, into the pill-shaped slot. Ensure it’s oriented as shown and no part is protruding. Repeat for all.

Step 3
Align tab from the side panel to the pocket of the wider shelf column. Repeat this step for the opposite column.

Step 4
Secure the side panel to the wider shelf column using a screw. Repeat this step for the opposite column.

Step 5
Align the tabs of the columns with the pockets of the shelf panel. Flip the unit so it stands on the ground upright.

Step 6
If this is your final top module, secure the shelf panel to the columns with two screws. Now jump to step 8.
Important!
If this is not your top module skip this step and jump to step 7.

Step 7
Secure the shelf panel to the columns with the included threaded plastic dowels. Screw them down simply with your hand or with a non-electric screwdriver

Step 8
Position the holes underneath the sidepanels over the plastic dowels and push down to secure the module. Make sure it sits flush with the surface.
Step 9
Finished.
Important! To prevent tipping, attach the included anti-tip brackets to the topmost module and anchor them securely to the wall. Wall-mounting hardware is not included.