← Back to all guides
Capsule Bench — Assembly guide

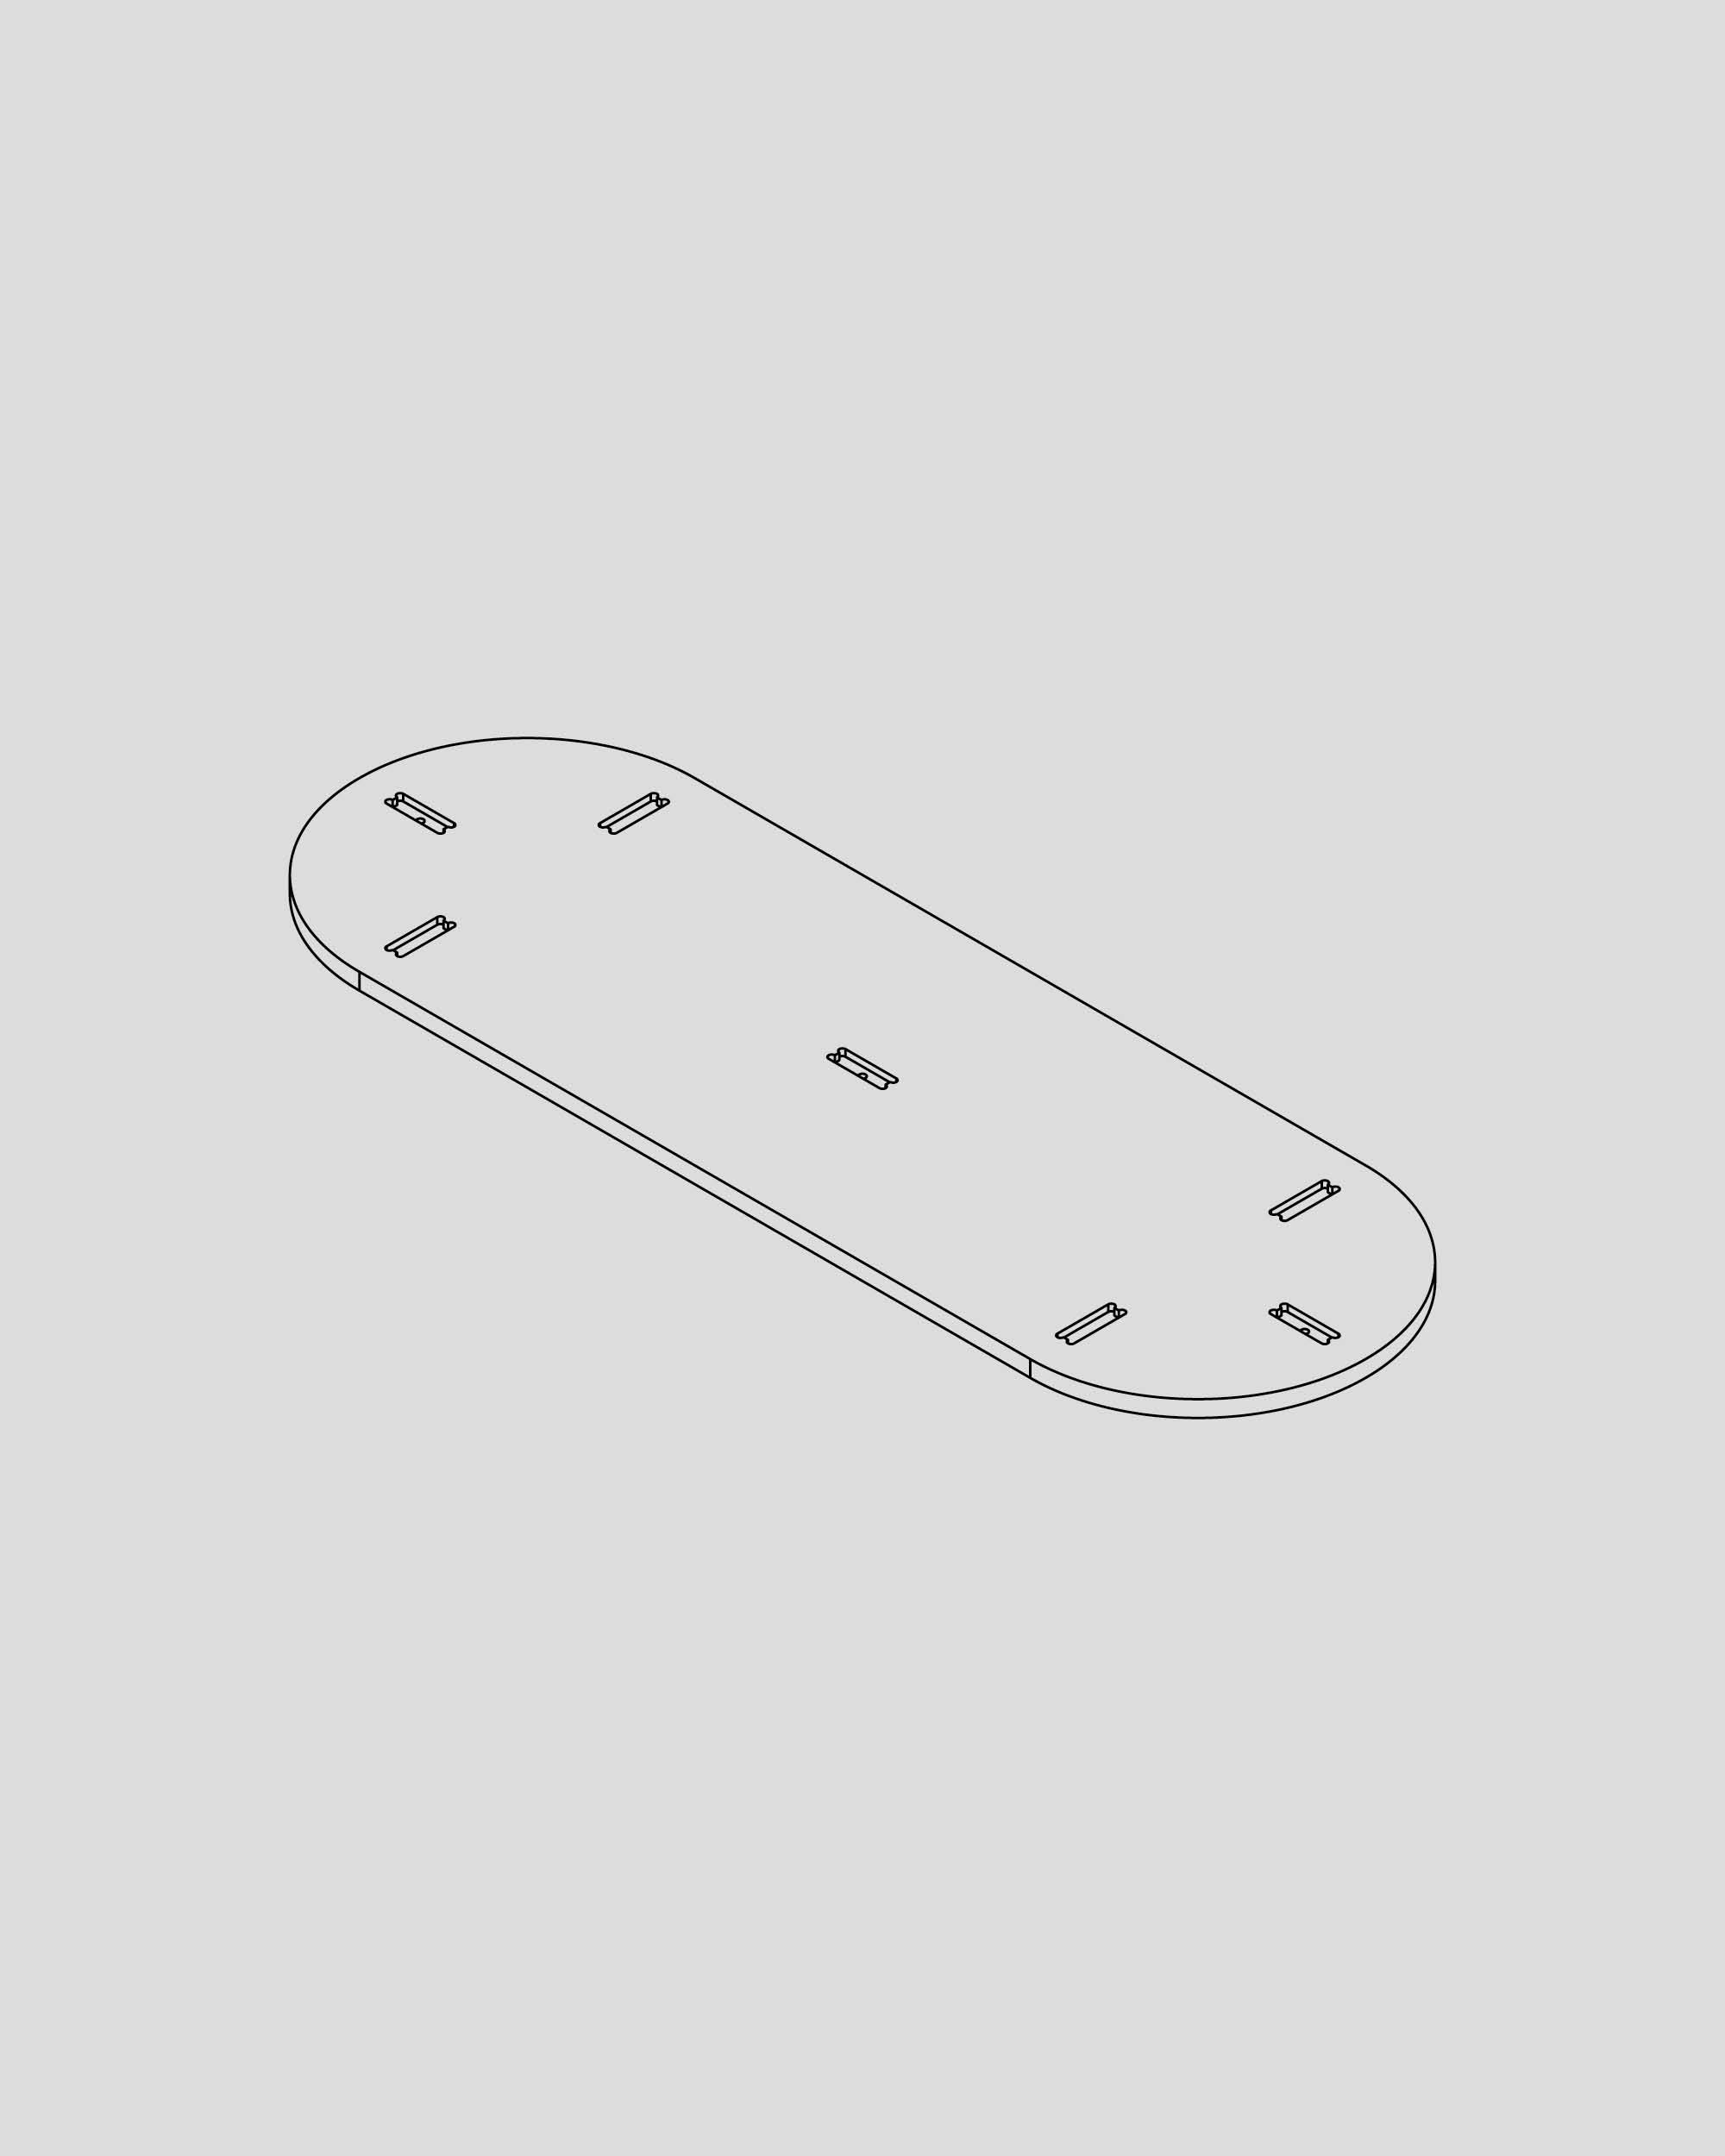
Step 1
Lay the top on a flat and soft surface with the pockets facing upward.

Capsule Bench — Assembly guide

Step 1
Lay the top on a flat and soft surface with the pockets facing upward.

Step 2
Fit the legs into their corresponding pockets.

Step 3
Fit the cross-beam into its corresponding pockets.

Step 4
Make sure all pieces sits tight and flush with minimal to no gaps. Flip the bench over so it stands on the floor.

Step 5
Drive in the screws using a non-electric flat-head screwdriver. Stop when the head is flush with the surface; avoid over-tightening.

Step 6
Finished